
Building Better Emails to Increase Conversions
Are you looking for an efficient way to create emails and send them out to your customers/subscribers? Or maybe, you have too many tasks at hand, and want an easier way to create your email content? What you need is an email builder tool that will automate this task and save you the trouble of creating and sending emails manually.
Thankfully, you don’t have to sweat it; we have just the solution you need. In this post, we’ll walk you through the Munro Agency Email Builder tool and how to use this tool to engage better with your customers and prospects and increase your conversion rate.
Why is email marketing so important?
Email marketing has always been an essential and impactful aspect of marketing. Developing a solid email marketing plan allows you to reach and engage with your target audience in a customised manner while still increasing sales at a low cost. Email marketing tools, like other digital marketing channels and media, enable your business to reach its audience more efficiently and easier than ever before.
Table of Contents
Building emails with templates
By following the best practices we’ll discuss here, you can be better prepared to create emails that will promote engagement from your audience. But before we delve into this tool, let’s look at how templates can make your work easier.
Using templates is critical to helping you build email campaigns faster. An ideal email builder tool will include customisable email templates, which allow you to create targeted emails based on your business goals and the buyer’s journey of your audience. An email template allows you to customise the formatting and text of emails that you send to your subscribers. Email templates can either be text-only or HTML and text.
Here are some more specific benefits of using email templates for building and sending out emails;
- Email templates make document management easier and more efficient
- It saves you time and money
- It reduces the stress on your employees, i.e., the users responsible for your email campaigns
- Since it is automated, it reduces or eliminates human error and improves your efficiency
- Personalisation is easier and faster with email templates
What does an email template look like?
A good email template is the foundation of your success with a repeated workflow, such as building and sending out emails. To achieve this, the email builder tool you’re using should feature some core functionalities in the templates that will make your work easy. A good email template should:
- Be simple and visually appealing
- Contain placeholders for personalisation
- A header and a footer
- Encourage you to create an attention-grabbing subject line
- Contain graphics, or images, or infographics, and you should use them strategically
- A section for a precise and engaging content
- Have a call to action, especially if you are aiming to bring readers over to your site
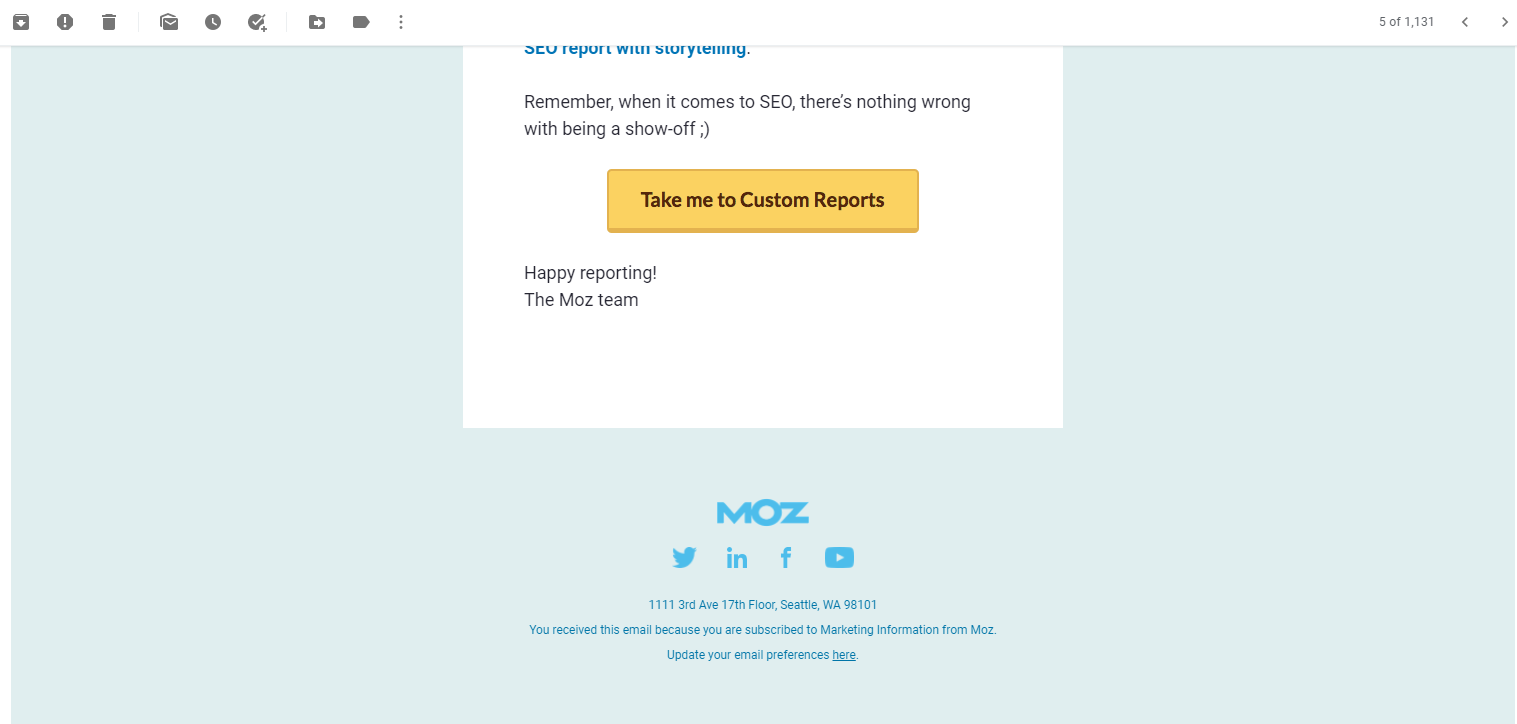
- Your company contact information, why the person reading it is receiving the email
- Have an easy-to-find unsubscribe/preferences links
Keep in mind that email templates can be customised for any and every kind of business. Below are some examples of email templates that you can use. Observe closely and see how these emails contain the same features highlighted above.
1. Promotional email from MOZ
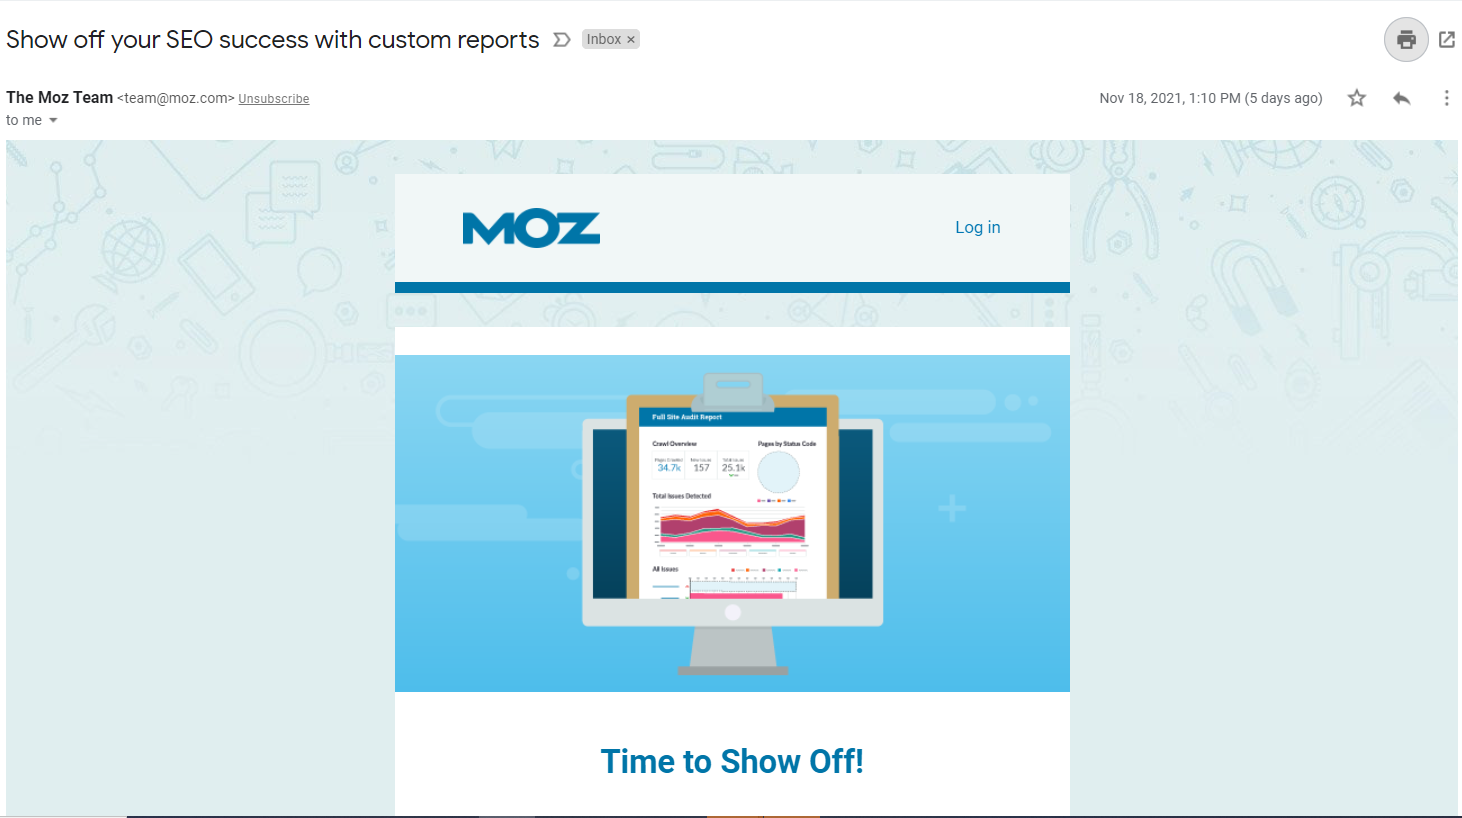
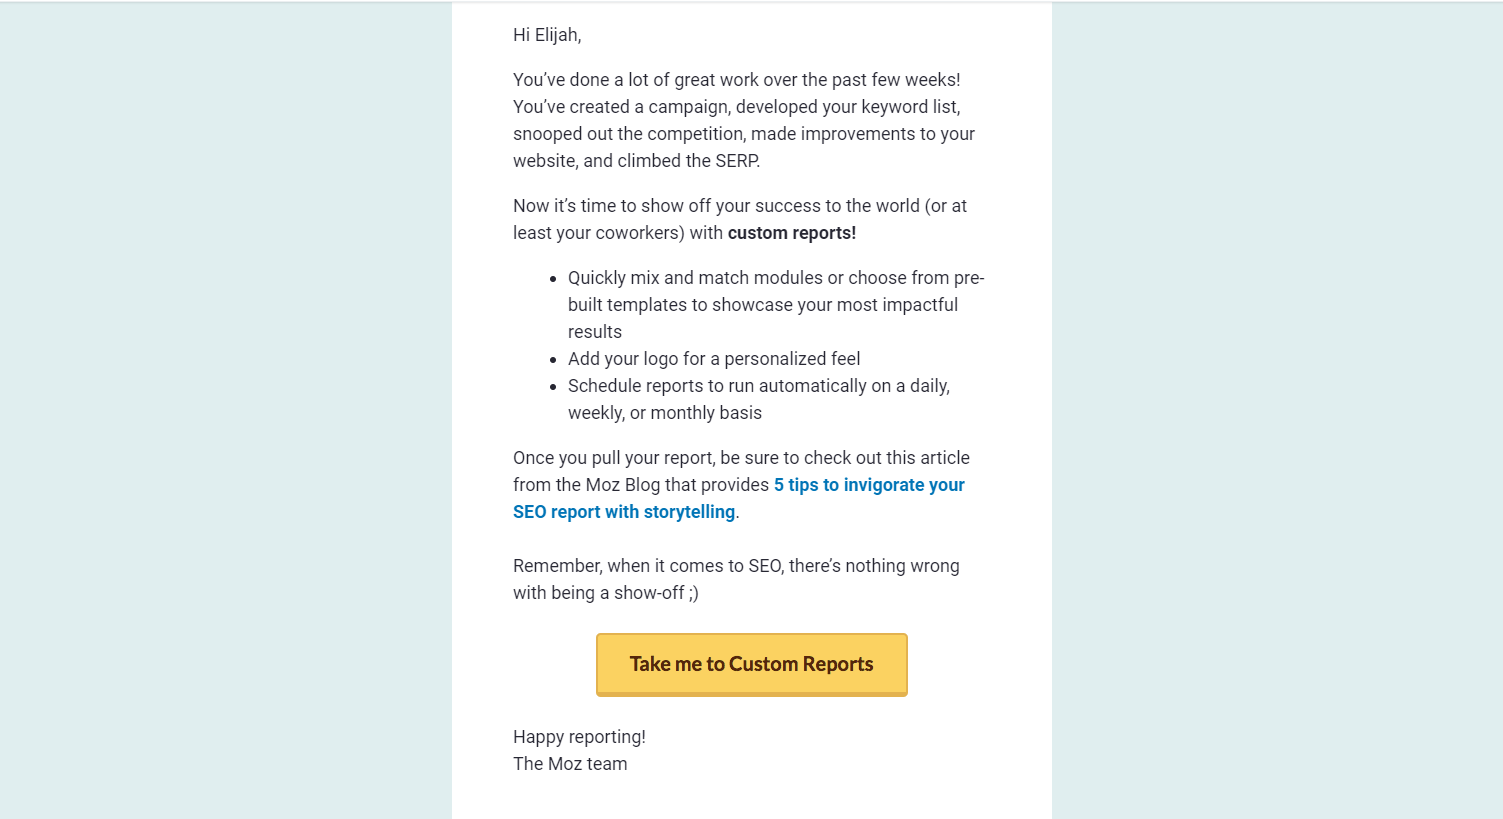
Click on the image to view the full image
2. Product awareness email from Shutterstock
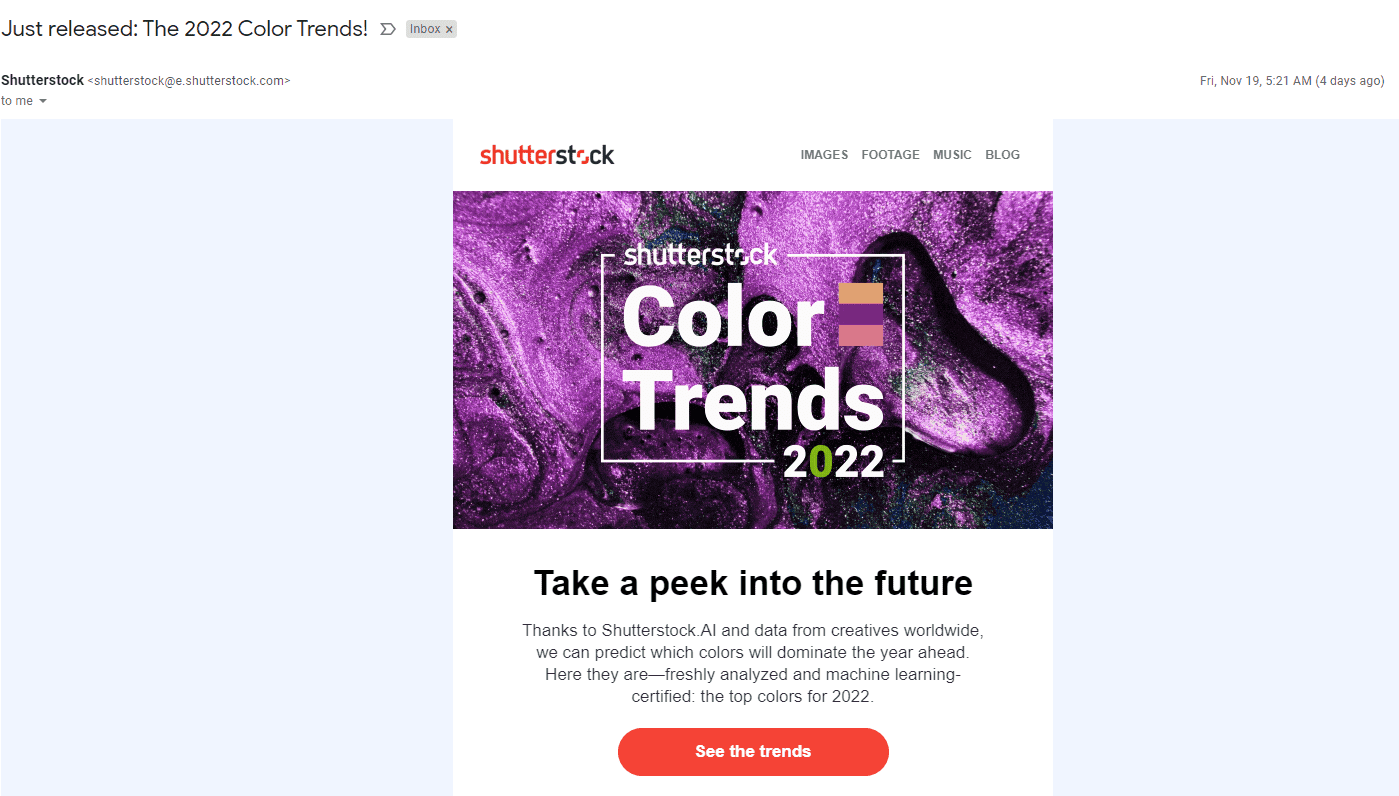

Click on the image to view the full image
Laying the foundations for your Email
Every good building begins with a solid framework, and building emails on our platform is not different. Our email builder tool provides a platform that allows you to build your emails from scratch using several embedded templates.
Use templates to streamline your build
All emails start with a template. They allow you to accelerate the process of building emails. To get you started, there are 42 base templates, 10 designer templates, and 32 more templates to get you started. You can choose the template to use depending on the kind of email you want to send out.
The best thing about this tool is that you not only get to use our templates to create your emails, but you can also use a custom template by designing your own template to fit your brand. You can gain consistency by creating new templates based on successful emails.
Manage your digital assets
We make sure that you have all the components that you need to generate content. This begins with understanding how to make accessible everything you will use when constructing your emails. This is basically the aspect of managing your digital assets.
In the email builder and on other parts of the application, you can store images that you intend to use on the emails. You get to add and edit images through the File Manager. The easiest place to access these images is through the ‘+’ sign that is available in all areas of the application.
If it is an image that you will use in various ways, it is recommended that you have a few different sizes of that specific image. There is a range of sizes that the images will take, such as a larger background image or a smaller display image. Have multidimensional images to be more prepared when you need them for various purposes.
Tweak the email style
Apply template-wide style rules using our style editor or edit the code itself. You have access to different front-end tools on all our templates, and all parts of the template. This allows you to create what you want, and you can see the changes that you make in real-time. You can fine-tune some aspects of the email and tweak the style to suit your needs and requirements.
Now Build Your Email
Now that you have your framework in place, use the drag and drop feature to create dynamic emails. The email editor and the landing page editor use different tools. The landing page editor allows you to pick and move around elements as you create your landing page, but the email editor gives you the feature of dragging elements around. You get more of a visual representation of where things are going to land, and even when they land, you can adjust them and reorder them. The real-time visualisation feature allows you to see the final outcome and how it will look like. What you see is exactly what you get, meaning what you see when you preview is what the recipient of the email will see.
Executing your aesthetic
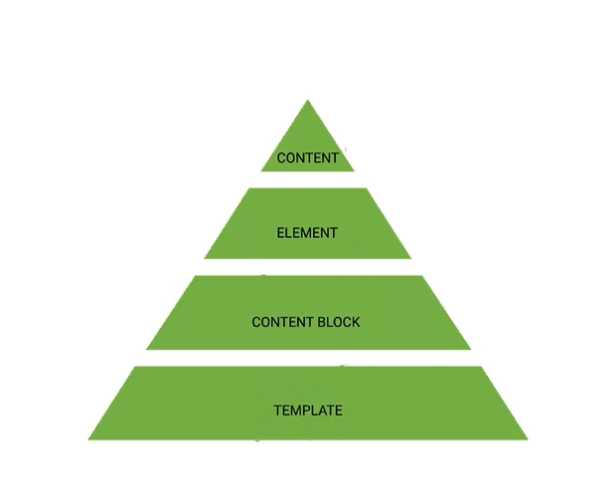
The first thing you need to do is to understand the hierarchy of your layout. The base is the template, as it forms the framework for your email. Once you have the template in place, you can then add content blocks to each of the templates. These are some forms of pre-formatted layouts to which you can add elements. The elements you use will depend on what kind of content you want to produce. You can have image elements or text elements that will then allow you to create the content of the email. Having an organised approach for this will definitely set you up for success.
There are multiple versions of the email editor. You have a background layout editor and a content editor, and understanding this will help you decide which is best for what you are looking to create. One of the components of the email editor is a font feature where you get a variety of available fonts. All universally accepted fonts by all providers are included in the email editor.
You can expand the selection by importing your own custom fonts, but this comes with some limitations. One limitation is that when you import your own custom font, Gmail might not present it to a Gmail user. Instead, they will convert that font to a basic font and then present this to the email user. Ultimately, it is better to use the available fonts in the email editor because they are the accepted ones internationally. It provides consistency and the ability to have your content get to the recipient the way you want it.
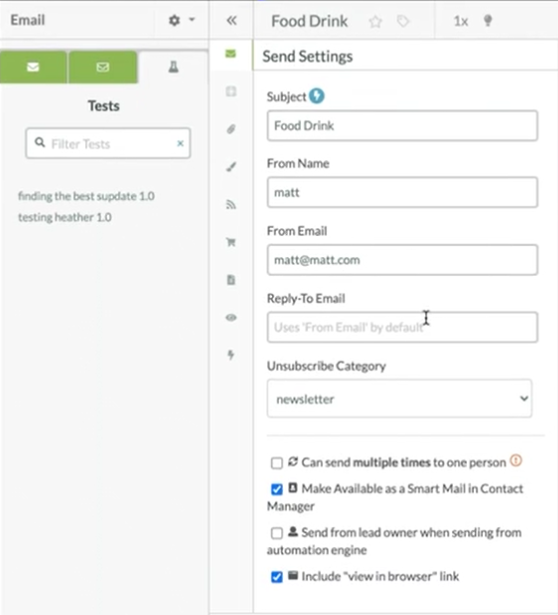
Adjust the Email Send Settings
Adjusting the send settings is so important because it is one of the best ways that you get to understand the role of email in your overall marketing strategy. As a best practice, you need to understand who is sending the email and who is receiving it. By default, when you create an email, the person generating the email will be the “From” email.
Try not to send content from a generic address or an open engine email address because it does not have an impactful delivery rate. You should edit that for deliverability where you change the email address to a personal address. This is more guaranteed to get you the impact that you are looking for.
All emails that you create from our platform can only be sent to someone once by default. That is a feature that is aimed to protect you and stop you from flooding someone’s inbox with the same email. The platform has a “Tag it and bag it” feature that you can leverage on. There are two unique features that tagging and email have. One is in terms of reporting, where you can tag emails within a certain theme and run reports based on the tag. You can aggregate all the engagement to get a better understanding of the impact or outcome of email marketing.
There is also the aspect of automation where, for example, if you have 3 drip campaigns and you tag emails in each, you get to attain secondary automation that comes from when someone takes action on an email with a tag. It allows for consistency in terms of automation.
Make it personal
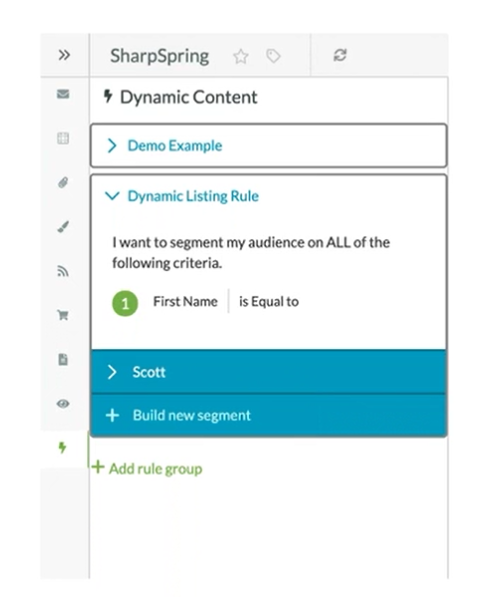
Our platform allows you to leverage the information you are gaining about people to present the content that resonates with them. You can construct content using tools like merge variables and dynamic content to improve deliverability and engagement as well. The more you do it, the more effective your email strategy is going to be.
Personalised content shows some familiarity to the recipient, and you have higher chances of them opening your email. You can use the same components on your landing page to create cohesiveness for your overall marketing strategy. Our email builder has some merge variables specific to email sending to make the process much easier for you.
In-App Walkthrough
When you are approaching the email builder, the quickest way to start creating is through the ‘+’ sign on the top right. It gives you direct access to any area of the application and to the content, as well as to the File Manager.
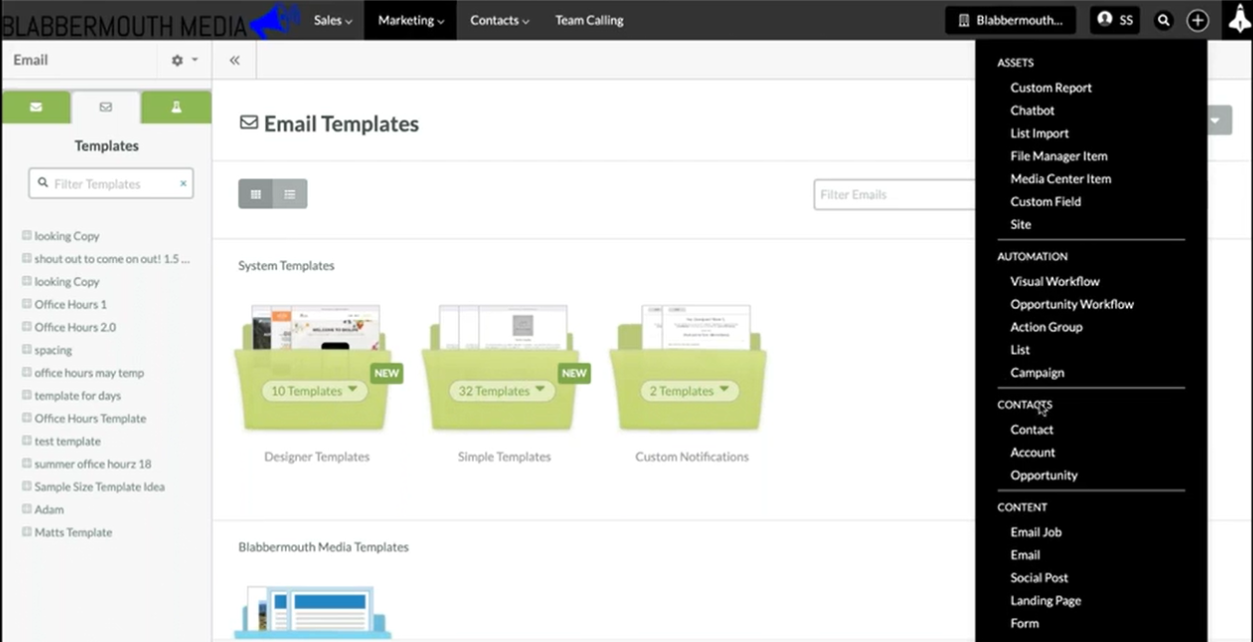
On the home page, you will see the simple templates, the designer templates, and the custom option. If you are not very familiar with building a template from scratch, you can go straight to the designer template since it has a finished product look to it already. When you want to start creating an email, click on the ‘+’ sign on the email template you choose, and you can fill in the details required.
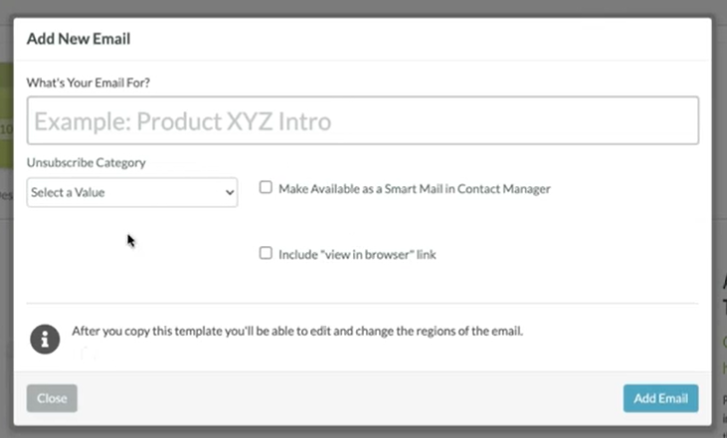
To build a new template from scratch, click on ‘+ Add Template’ from the home page, and you can choose the layout for your email. You can do this manually, or use a code to create an email template from zip files.
From the simple templates, there are some unique ones that you can use to build your email. The ‘drag and drop template’ and the ‘plain text template’ are some of the most popular ones. The plain text template allows you to replicate emails directly from a provider. While there are no images on this template, you can use HTML to create dynamic content.
Once you have the template set up, you can begin uploading the files you want to use in creating the content. You can add images and attachments directly into the system, organise them into folders and edit them as well. The standard email on our system is based on an 800-pixel wide template. Use large resolution versions of an image to get the best view for your audience. You can edit it in the file manager or before you upload it to our platform.
When you have added content to your email, there are settings on the left where you can get quick access to other emails and email templates. There are send settings you can customise to suit your preferences.
There are various themes options from which to choose once you are in a template. You can edit aspects of your text blocks such, as the colours, the paragraph styling, and the fonts. Also, you’ll be able to merge variables from here, where you can add custom fields, recipient fields, lead owner fields, unsubscribe fields, global merge variables, and link merge variables.
You can add images here, including a dynamic image that you can add using a link. There is a Shutterstock feature of the email builder that allows you to add images to the template directly from Shutterstock. An added feature of the email builder is that you can bring up the email history to see past versions of the email you are creating and restore any versions of that.
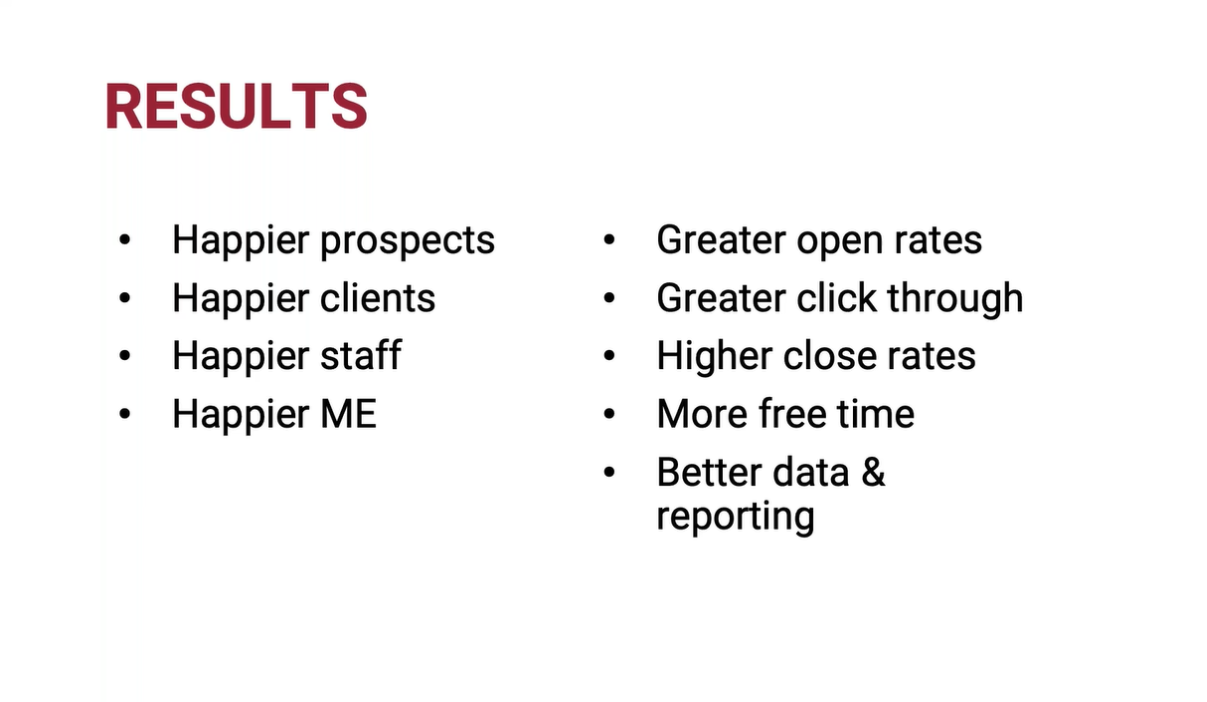
Case Study
Our case study is a boutique marketing agency that serves some regions of New York and specializes in small business marketing. Their focus is small businesses in industries such as food and beverage, e-commerce, fitness, health, among others. Being a small company, balancing all tasks was a challenge. The email builder helped them send out emails in a better and easier way. It provided automation and consistency that made it possible for them to focus on the larger processes of the company.
Some of the emails they needed to send out were monthly newsletter emails with agency updates and valuable content. So an email series was used to nurture leads by highlighting five different blog articles about basic marketing concepts for small businesses. Also, they needed to send one on one emails to walk leads through scheduling emails, sharing articles, and visiting relevant content.
Through using our platform, they were able to use pipeline stages as triggers and create a series of automated notifications for their customer support tasks. They are using our series of templates to create dynamic and highly personalised emails that resonate with the recipients. This has made their email marketing strategies and lead generation efforts more effective in the long run.
 Some Exciting Updates on Our Email Builder
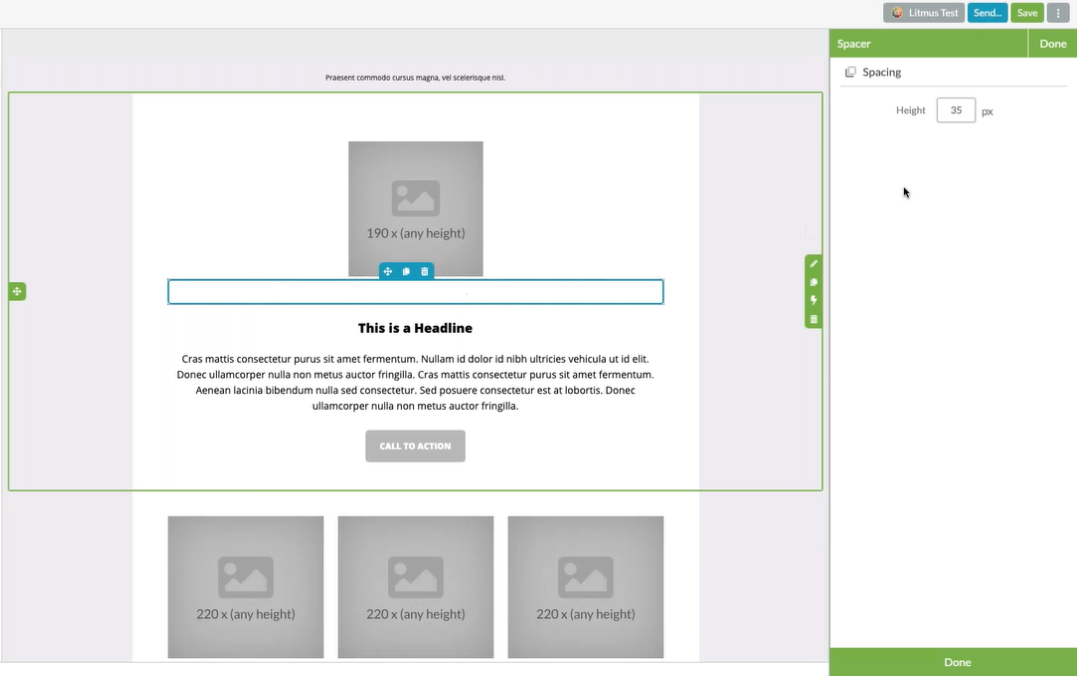
The space feature
One of the additions we have made to the email builder is adding the spacer option. This allows you to add some space before or after some elements in the template. You can adjust the height or bandwidth of the spacer to suit your design. Hence, you get to determine how different elements sit in relation to each other. The spacing feature is part of every part of the template that has some space.
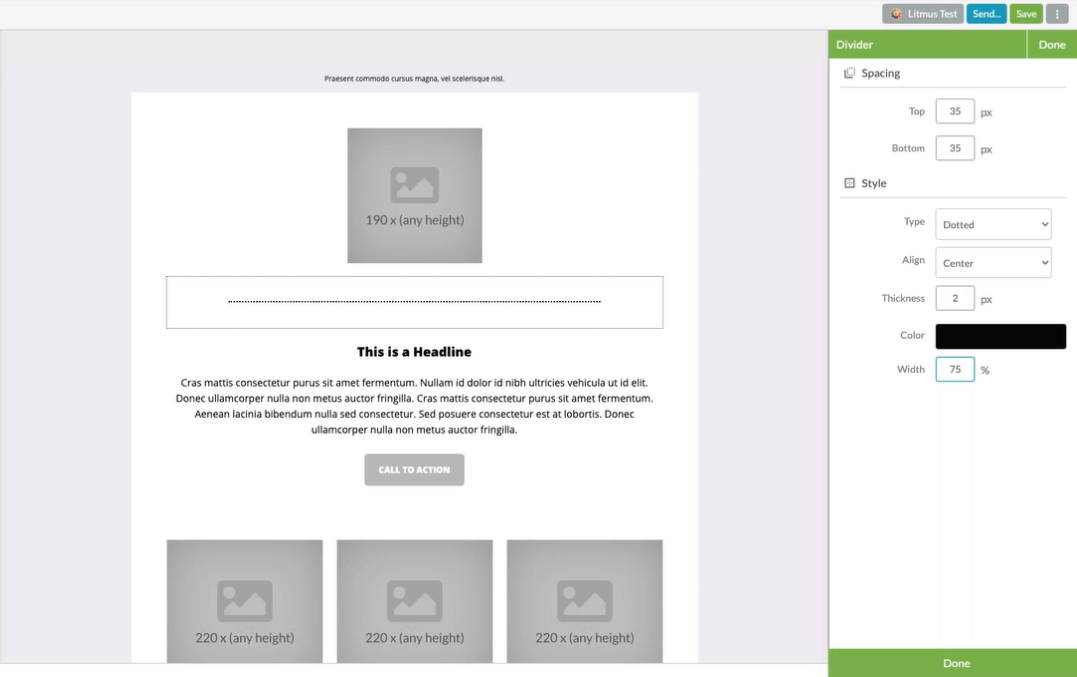
The divider
This is a spacing element that has a visual component. You can have a dotted, a solid, or a dashed line depending on the impact you want on your template. It is a form of page break that gives you more control. You get to decide the color and alignment of the divider, as well as the thickness.
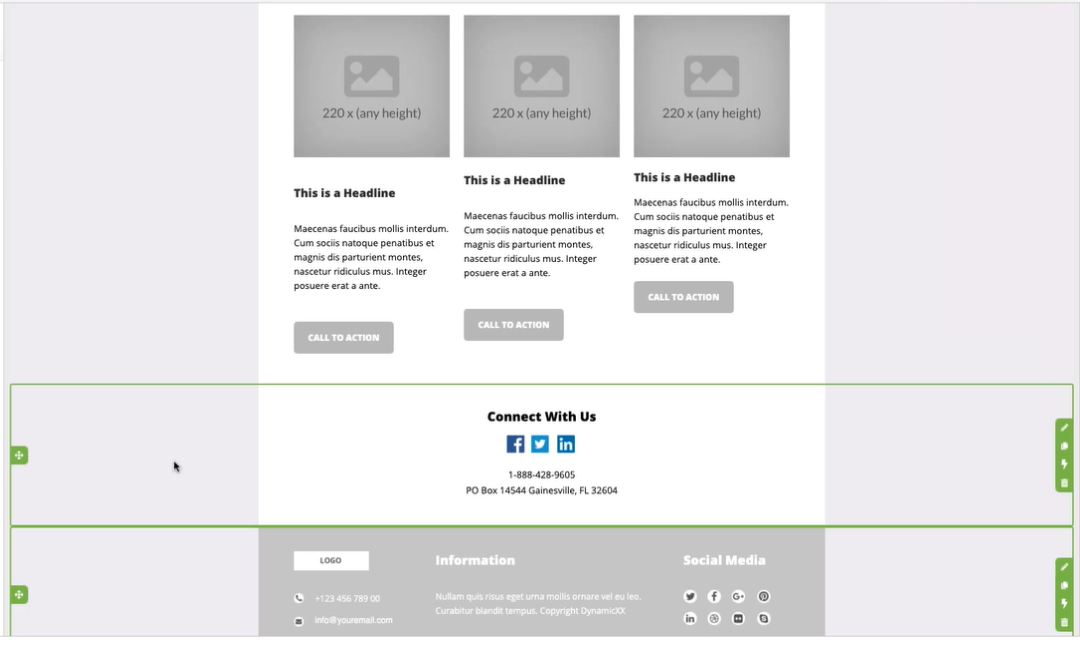
Social media prompt footers
We have a new social footer element that gives you more freedom. You have a lot more control because you have a wider array of available social prompts to include platforms like Reddit, Instagram, Facebook, LinkedIn, and Twitter. There is also a spacing element to it that allows you to reorient, add some social prompts and remove others.
At Munro Agency, we offer a variety of marketing software, such as our email building platform that allows you to create emails from scratch using templates and various elements. This and other marketing automation software we offer our clients are designed to improve your productivity and bring you more sales. We are a Sharpspring Platinum Agency dedicated to helping you bridge the gap between your sales and marketing efforts. We also offer a highlight targeted b2b lead generation service to many of our UK and International customers. Guess what, you can request a free trial of our email builder tool. to get started, reach out to us today.


Leave a Comment